DIY Road Case
 March 20, 2012 - http://www.ehow.com/how_7856862_diy-road-case.html
Road cases are designed to protect equipment, props or tools that are used in a traveling business, or performance troup. They are also known as flight cases and can be built from various materials. Two of the main features that allow many road cases to be easily moved from place to place are the folding handles and the large casters that allow the case to be lifted and rolled with as little effort as possible. Using ¾ inch plywood allows you to build a case that requires no frame, is strong enough to take a beating and light enough to be readily portable.
Instructions
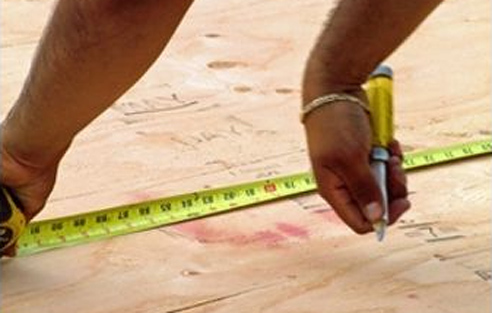
1) Group the items you intend to store inside your road case together on a table or floor. Arrange them in a logical order as they might fit into your case. Measure the width, depth and height of this group. Add 2 inches to each dimension for foam padding.
2) Cut your pieces from ¾ inch plywood using a table saw. Cut one bottom two inches wider and deeper than your group of items. Cut one top 1 ½ inches larger in both directions than your bottom. Cut two sides the same width as your bottom and 2 inches taller than the items and two ends, two inches taller, and 1 ½ inches deeper than the bottom piece. This extra depth on the ends, will overlap the sides.
3) Stand one side and one end on its bottom edge. Overlap the two pieces, with the end piece on top and its edge flush with the outside face of the side piece to create a corner. Glue and nail this corner together with wood glue. Drive 2 inch pin nails, from a pneumatic nailer, through the end piece into the edge of the side piece every 4 to 6 inches. Repeat to form the opposite corner of the box.
4) Fit these two sections together, overlapping at the corners in the same way, with the end pieces on top at the overlap and glue and nail the remaining two corners to form an open ended box. Apply wood glue around the edges of the bottom. Fit the bottom into the top end of this box, so that its outside face is flush with the top edges of the side and end pieces. Nail through the sides and ends into the edges of the bottom.
5) Drill pilot holes at each corner of each end piece, two inches from the corner and 3/8 inch from the edge, with a 1/8 inch wood bit. Drive a 1 5/8 inch deck screw into each hole to reinforce your case.
6) Position a 3 inch caster, two inches in from each corner of the bottom and drive a ¾ inch self-tapping, panhead, sheet-metal screw into each hole in each caster plate to anchor them to the box. The aggressive thread of these screws will ensure the casters are well attached.
7) Turn the box over onto its casters. Position the top piece atop the case with its edges flush with the cases sides. Measure the top of the edge side of the case and use a hack saw to cut a piece of ¾ inch piano hinge to fit that length. Position the piano hinge horizontally along the end edge, folded open, so that its top edge is flush with the top of the case and the hinge is facing out. Drive one ½ inch wood screw through each hole, into the edge of the top and the face of the end piece to attach the hinge.
8) Use a 1 inch paddle bit to drill a hole centered 2 inches in from the edge of the top, opposite the hinge for easy opening. Mount a locking corner hasp, two inches to one side of this hole. Position the hinge portion on the top of the case, with the latch plate on the face of end opposite the hinge. Mark the screw holes and drill 1/8 pilot holes for each hole. Drive a ½ inch wood screw through each hole in the latch plate and hinge portion of the hasp, so that the hasp will fold down and press into the latch easily to secure the case.
9) Position two folding utility handles, one on each side panel of the box, centered 1/3 of the way down from the top to the bottom. Mark the holes in the handle base plates and drill pilot holes. Attach the handles with one ½ inch wood screw through each hole.
10) Cut 2 inch foam to the fit the inside dimensions of the bottom, sides and ends with a utility knife. Apply spray adhesive to the inside of the case of the case and the back of the foam. Allow it to dry for the label recommended time, typically 30 to 60 seconds, then press the foam into place, starting with the bottom, then the ends, then the sides. Cut and apply foam to the top, 2 inches smaller in each direction than the top, for a good fit.